For
this step, you may need: 1 Phillips head screw driver
Summary
of this page: Installing the drive and setting up the cables.
Installing
the drive
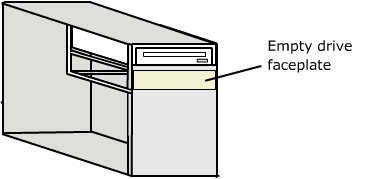
The first thing that must be done is the removal of the second
faceplate. These usually just snap into place. Take a look at
the inside of your tower to figure out how to remove it. If it won't
easily remove, it was probably intended to be broken out with a screwdriver.
Once the faceplate is removed, slide the new drive in from
the front as shown, and secure it in place with the screws that came with
it.
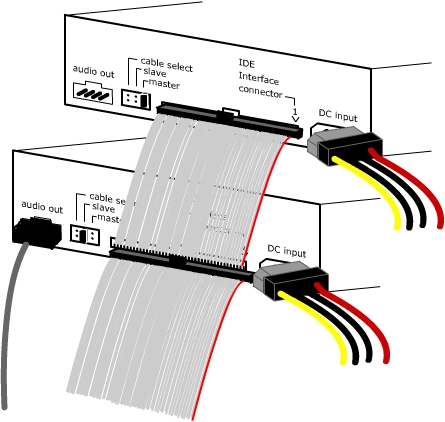
All that is required now is setting up the cables. The new drive
will require the 4-pin power cable, and the flat IDE cable. If you
plan to play CD's or DVD's through the new drive, you will also need to
remove the audio cable from the original drive and attach it to the new one.
The long flat cable has two connectors on it. It has one at the end
and another a few inches down. Plug the ending connector to the top
drive and the one below it to the bottom. See below.
Find any 4-Pin power cable and plug it in to the new drive.
Now that you are finished, replace the computer case, and
plug all the cables back into the computer and turn on the computer.
Install any software provided and enjoy.
If you found this tutorial helpful, please leave your
comments in our guest book.